SenagaGameMiru - User Guide
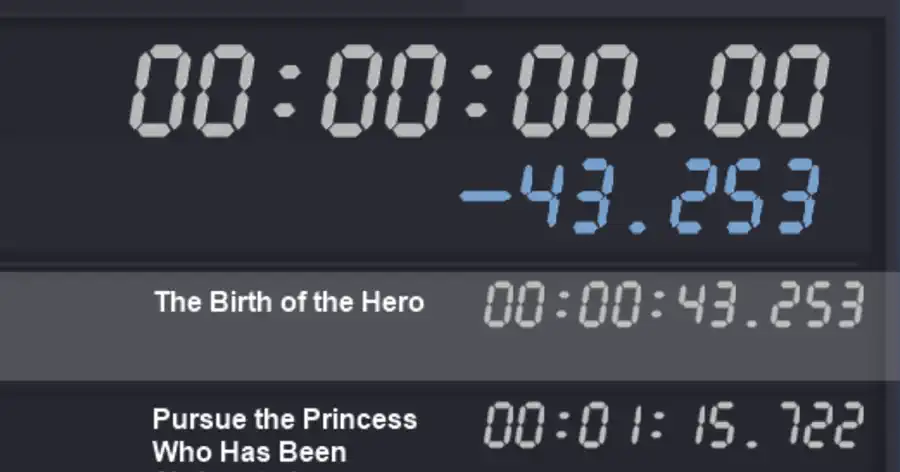
Summary of this article SenagaGameMiru is a stopwatch-like application for Windows, suitable for use as an RTA (speedrun) timer for games. To use it, first register your stage data, then register your hotkeys (shortcut keys). Select a display size to show the timer, start the timer, and advance to the next segment at your desired timing.
Download Link.

Things to Check First
Supported OS for SenagaGameMiru
This application is compatible with 64-bit versions of Windows 10 and Windows 11. It uses .NET Framework 4.8, which is installed as standard on Windows, so it runs without needing to install additional runtimes.
How to Close the Display
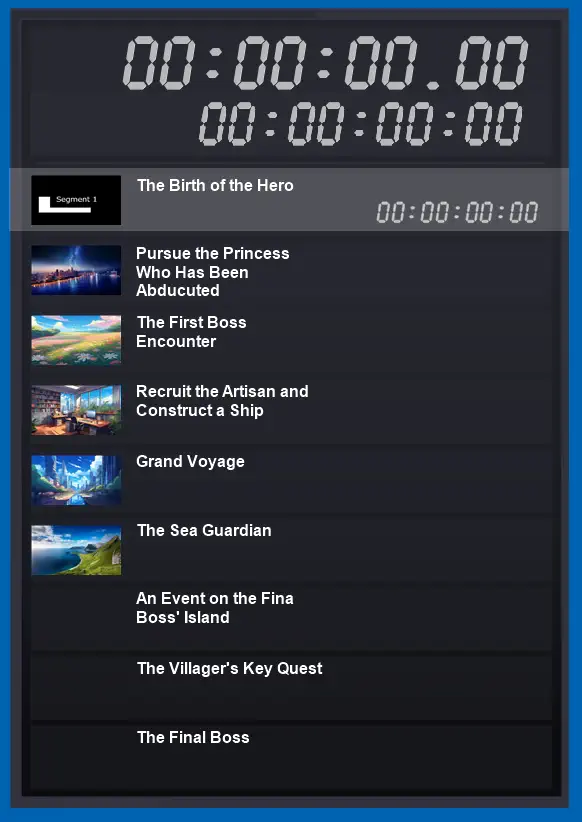
You can move the display by dragging it, or close it by double-clicking.
Select Language
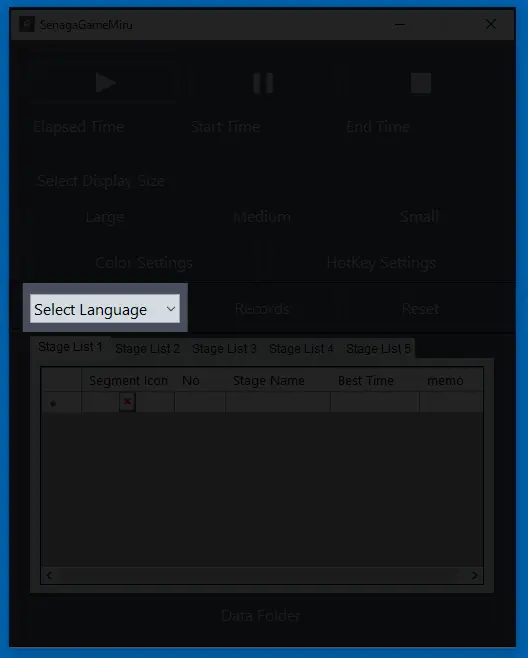
You can change the language to Japanese or others using the white background "Select Language" dropdown on the middle left. On this page, the explanation will proceed with the English UI.
Quick Start Guide
1. Check the Main Window
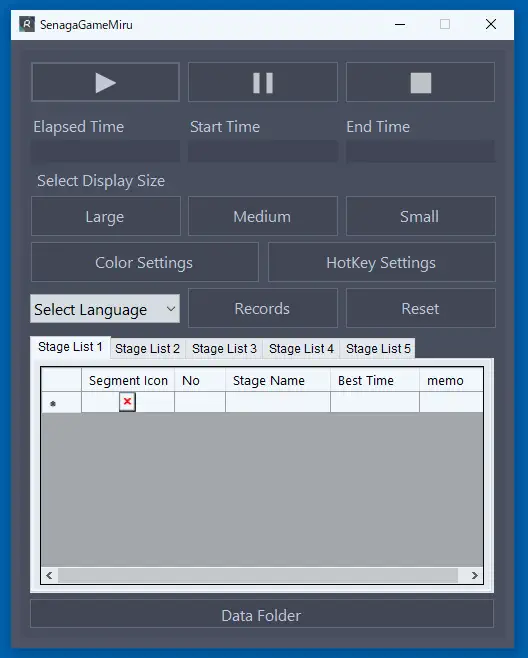
When you launch the application, this window will open. This window is called the Main Window.
2. Register Game Stages and Segment Names
You can switch between up to 5 sets of data using the Stage List tabs at the bottom of the main window. For this explanation, we will use Stage List 1, which is displayed by default.
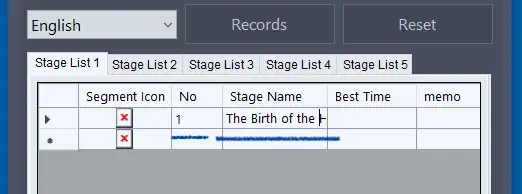
Clicking a cell will turn it blue. You can type to enter text while it is in this state.
"Segment Icon" can display icon images. This will be explained in the next topic.
"No" is used to enter numbers or markers. Usually, you enter them in order starting from 1. This is used when displaying recorded data in the Records window.
Register the segment name in "Stage Name".
"Best Time" will be entered automatically later, so you can leave it blank or enter a target time in the format of 00:00:00.000.
Register the segment name in "Stage Name".
3. Display Segment Icon Images
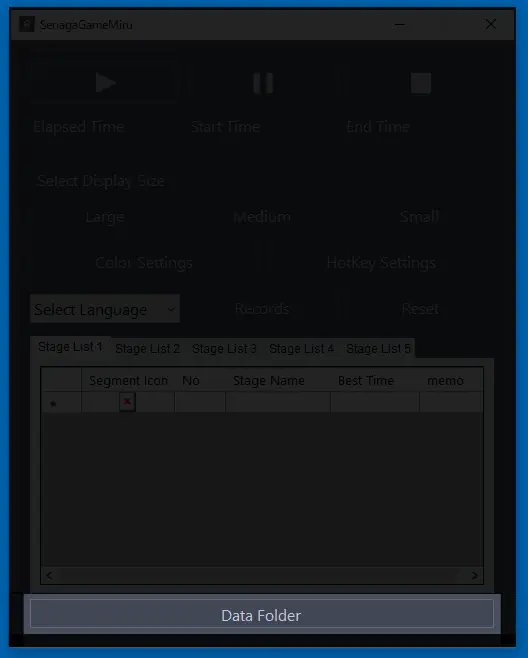
To display an icon image for a segment, click the "Data Folder" button at the very bottom of the main window to open the "SenagaGameMiruData" folder. The files and folders used by the app are located here.
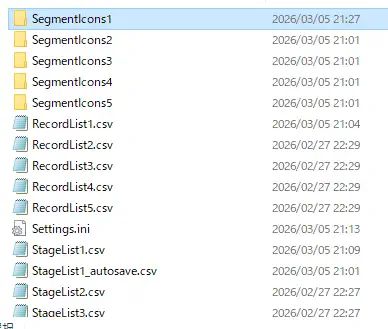
Since we entered stage data in Stage List 1 this time, we will use the SegmentIcons1 folder.
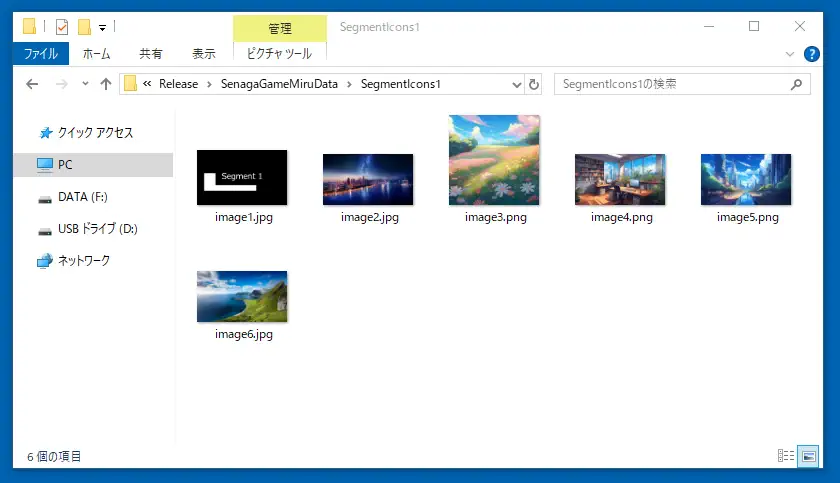
You need to prepare the icon images yourself. Place the images here with filenames like image1.png or image1.jpg. Match the number at the end of "image" to the order corresponding to the cell's row.
If you registered several rows of Stage Names as introduced in "Register Game Stages and Segment Names" above, the number at the end of "image" is determined by the corresponding row number.
For example, if you want to display an icon image for the 3rd Stage Name, place the image in the folder with the filename "image3.png" or "image3.jpg".
Once the placement is complete, you need to update the segment data in the main window. It will be updated simply by switching the Stage List tabs.
For example, if you want to update Stage List 1, click another tab like Stage List 2, and then click Stage List 1 again to refresh the display, and you should see that the contents have been updated. However, doing this while the display is active may cause an error.
The display will be explained below. You can confirm that the icon image is shown.
4. Show the Display
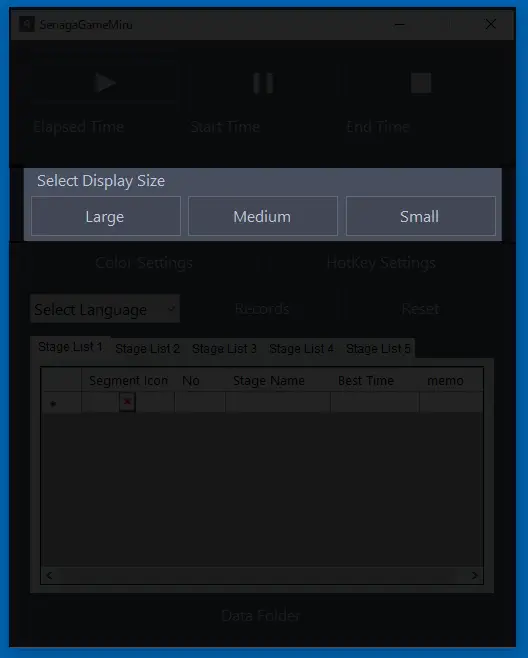
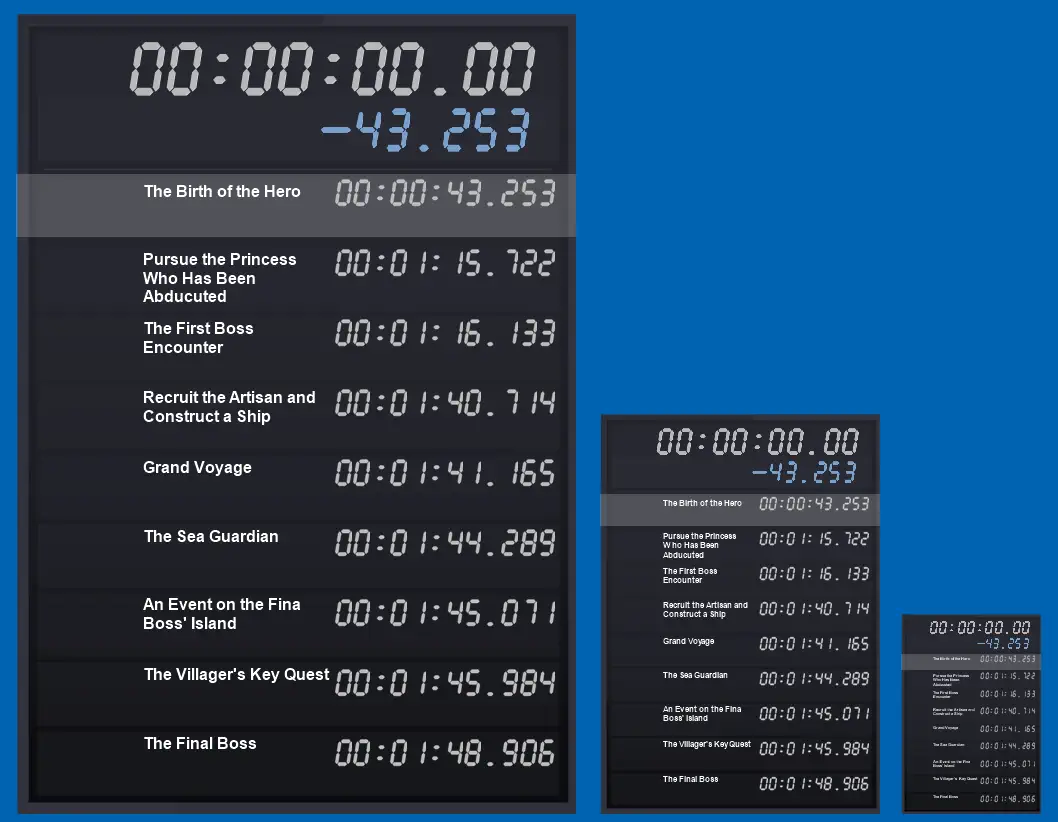
Once you have registered the stages and segment names, let's show the display. We have prepared three sizes: Large, Medium, and Small.
The displays come in large, medium, and small sizes, each scaling down to a quarter of the previous size.
5. Start / Pause / Stop the Stopwatch
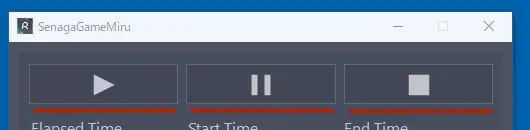
Once the display is shown, click the Play button to start the timer. You can stop it using the Pause or Stop buttons.
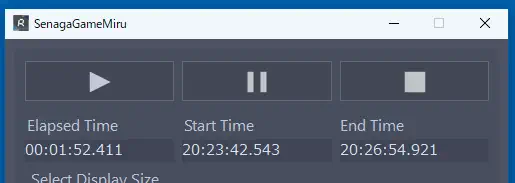
Pressing the square Stop button will display your time, as well as the Start Time and End Time of the stopwatch, allowing you to copy the time text directly.
6. How to Register and Use HotKeys
While playing a game, you won't have time to operate the main window of SenagaGameMiru. Therefore, you can register shortcut keys so you can operate this app even during gameplay.
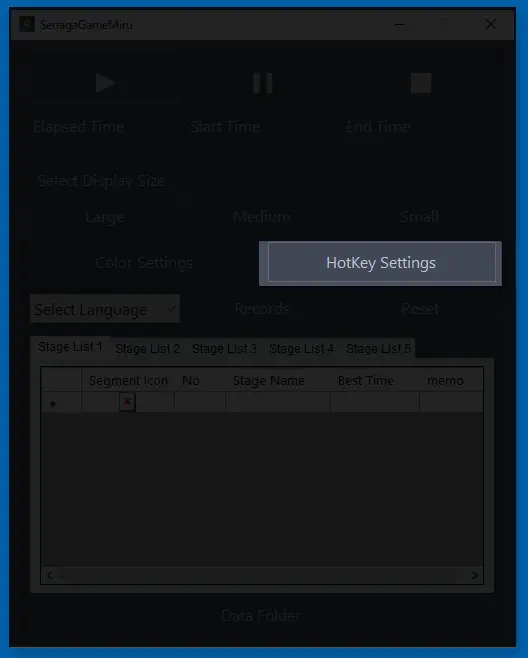
Click the HotKey Settings button from the main window. Registering the same hotkeys as your game's shortcut keys will cause issues, so you must register shortcut keys that are not already in use.
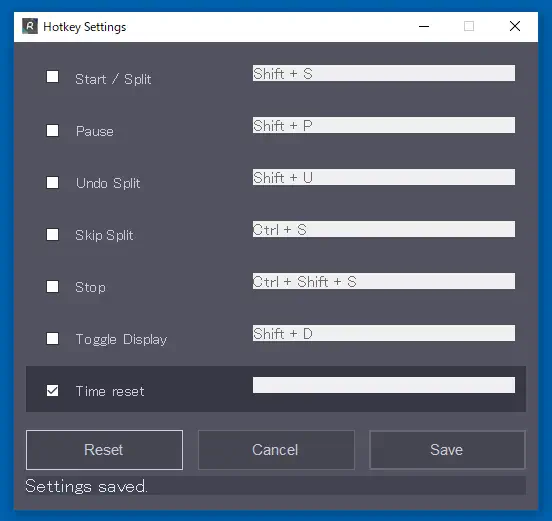
The supported shortcuts are as follows.
"Start / Split" is used to start the timer and move to the next segment.
"Pause" is used to pause the timer. To prevent accidental inputs, it is usually better not to set this.
"Undo" is used to return the timer to the previous segment.
"Skip" allows you to balance things out by executing a skip if you mistakenly forgot to press split when moving to the next segment.
"Stop" stops the stopwatch. Executing this will record your time.
"Toggle Display" allows you to hide the display or show it again.
"Reset" initializes the time. Please execute this after pressing Stop.
How to Change the Display Color
You can customize the colors of the display to your liking.
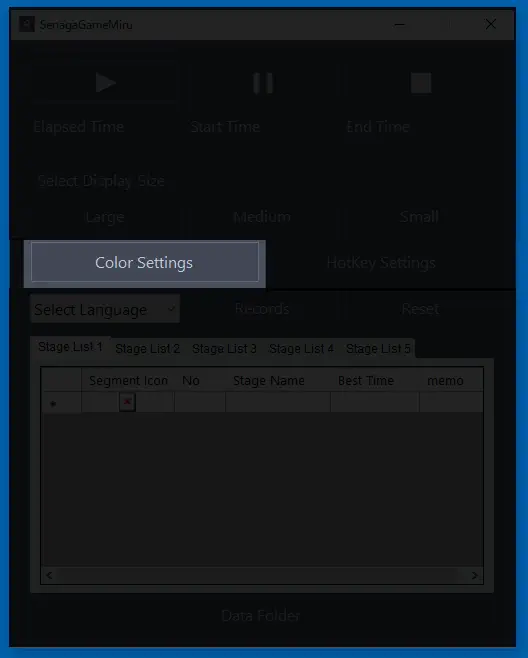
Click the "Color Settings" button from the main window. You can change the colors of the display's frame and numbers.
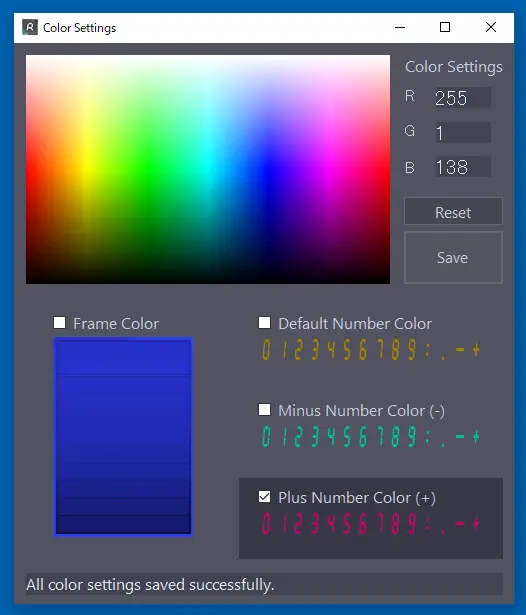
You can change the colors of the frame and numbers. Click the object you want to change, then click or drag along the gradient panel at your preferred point to change the color.
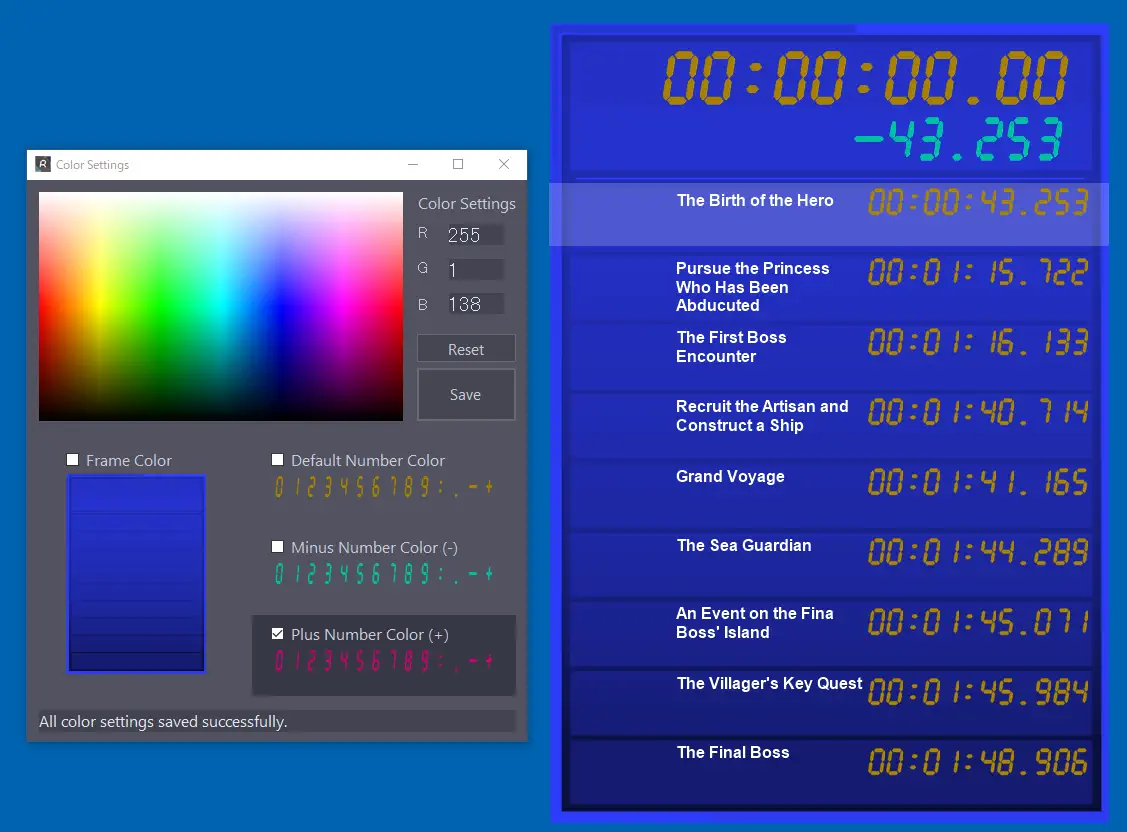
Once you have changed and saved the colors, you should be able to confirm the changes when you show the display again.
How to View/Delete Recorded Data in Records
In this app, once you finish measuring with the timer, pressing the Stop button or executing a stop will record your time for that moment.
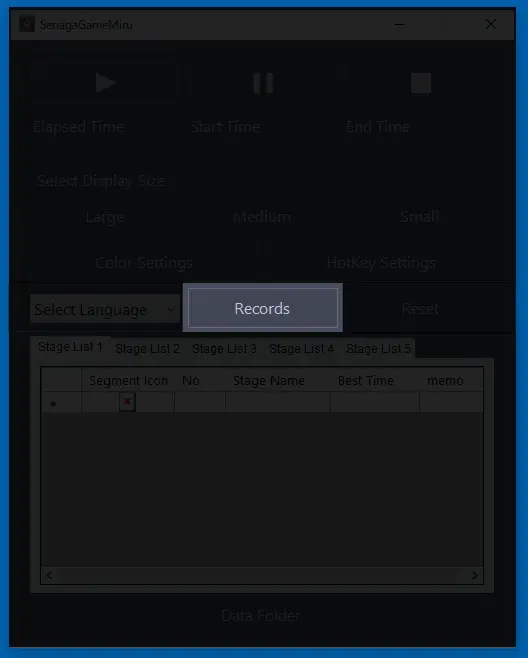
To view recorded data, click the "Records" button.
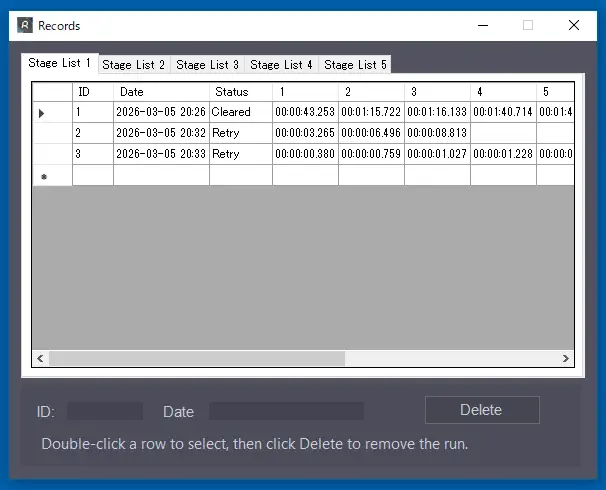
A Status of "Cleared" indicates recorded data of a completed run. "Retry" indicates data where you retired halfway. The column names like 1, 2, 3 in the image are the "No" part (segment markers) explained in "Register Game Stages and Segment Names". Clicking these will sort them in ascending or descending order.
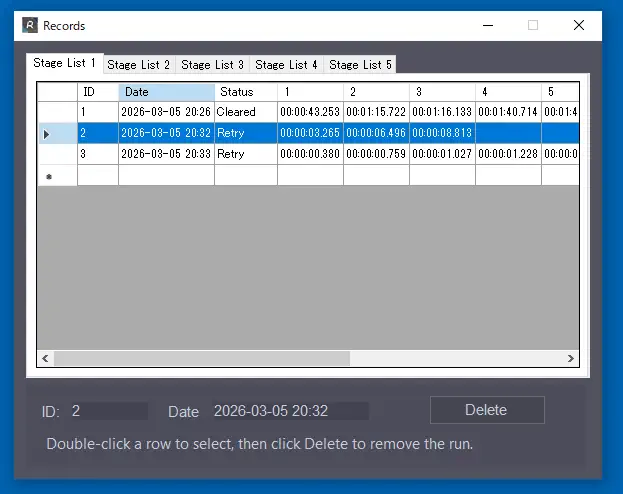
To delete a single time, double-click anywhere on the cell of the row you want to delete to select it. Once the ID and date data are reflected at the bottom, click the "Delete" button.
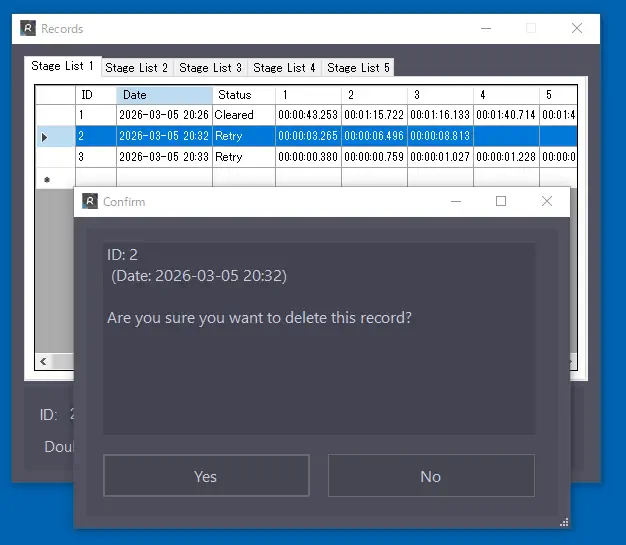
You will be asked to confirm if it is okay to delete. If it is fine, click the left button to delete it.
Window Colors Can Also Be Changed
Just like "SenagaTimeMiru", "SenagaGameMiru" also allows you to change the window colors.
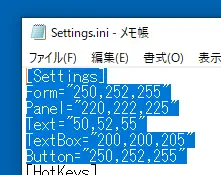
Clicking the "Data Folder" button at the very bottom of the main window opens the "SenagaGameMiruData" folder. Inside, you will find a file named Settings.ini, where you can modify color information.
As shown in the image, the 6 lines of code from [Settings] to Button contain the color information for the window.
The code for changing the window colors can be found in "How to Customize the App" on the page below.
SenagaTimeMiru: SenagaTimeMiru Page
If you change the window color to white, it will look like the display below.
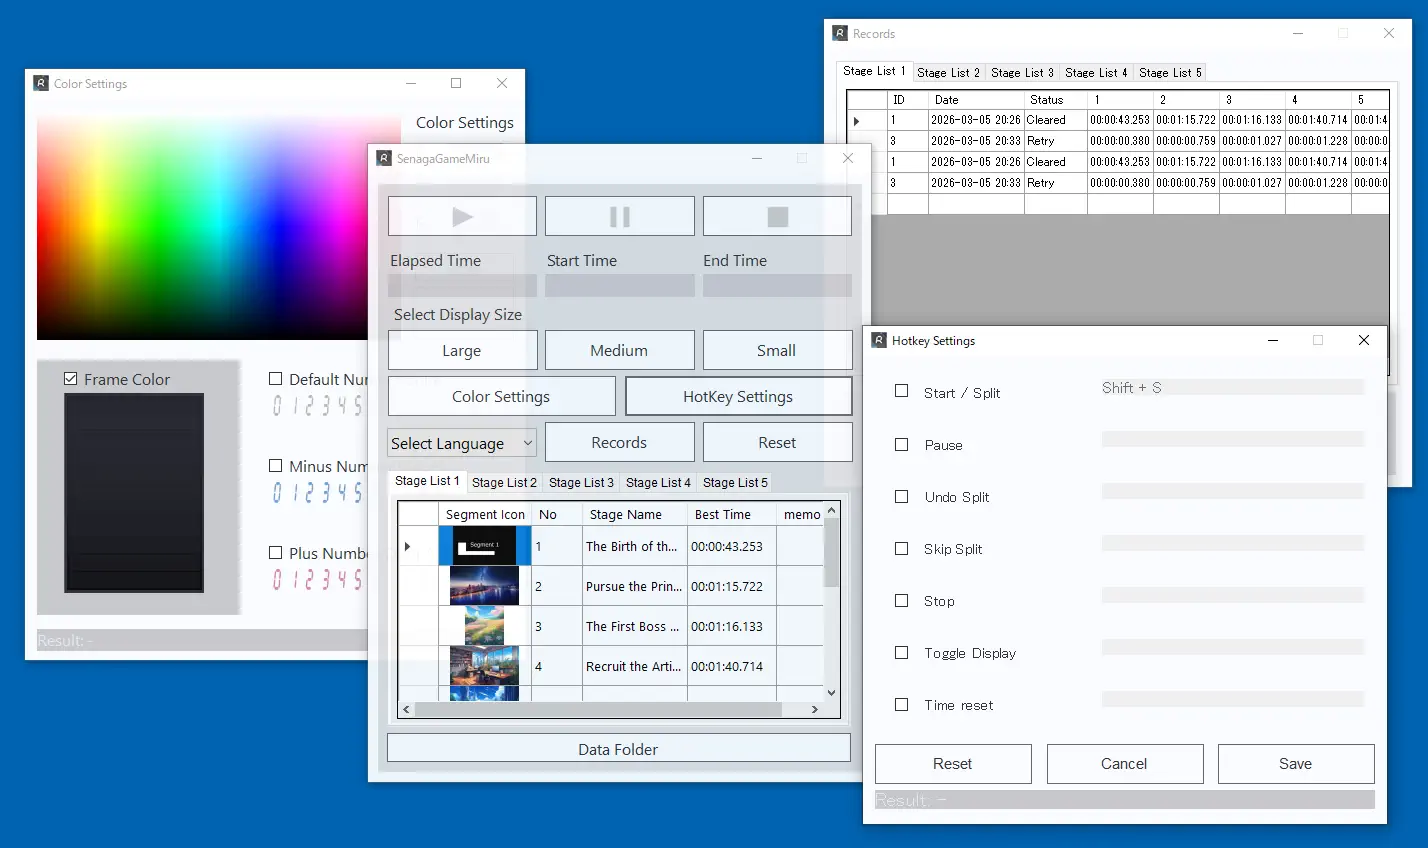
How to Fine-Tune Color Values Yourself
Let me explain how the white window color composition works.
[Settings]
Form="233,235,243"
Panel="240,243,245"
Text="135,145,155"
TextBox="161,175,203"
Button="230,232,240"
At first glance, the numbers might seem complicated, but each value recorded is a number in the range of 0-255. There are three numbers per line, corresponding to RGB. RGB stands for Red, Green, Blue, from left to right.
Form="0,0,255"
Using the code above, Red is 0, Green is 0, and Blue is 255, resulting in a blue window.
Form="0,0,0"
The above are all 0, so it becomes black.
Form="255,255,255"
The above are all 255, so it becomes white.
Form="255,0,255"
The above has Red and Blue at 255, so it becomes purple.
Form="255,150,255"
If you increase Green just a little, it will become a brighter purple accordingly.
Try experimenting with different values!